With plupload 2.0.0, Rails 4 compatibility, and other fixes.
See the full diff on GitHub: v1.0.6…v1.1.0
Logs on your development machine can quickly grow to a silly size, especially if you have long running projects.
An easy cure for this is to set-up logrotate (newsyslog on OS X) to rotate the logs once they grow past a certain point (1MiB in the example below), after all most of the time you’ll only be interested in the last few lines of your logs…
Create a new file in /etc/newsyslog.d called dev-logs.conf with the following contents:
# logfilename [owner:group] mode count size when flags [/pid_file] [sig_num]
/Users/USER/Programming/**/log/*.log USER:staff 644 2 1024 * G
You’ll need sudo rights in order to do this (the config file should be owned by root:wheel).
Note:
/Users/USER/Programming with the full path to your projects folder, e.g. /Users/bob/ProgrammingUSER in USER:staff with your username, e.g. bob:staffThe globbing pattern explained:

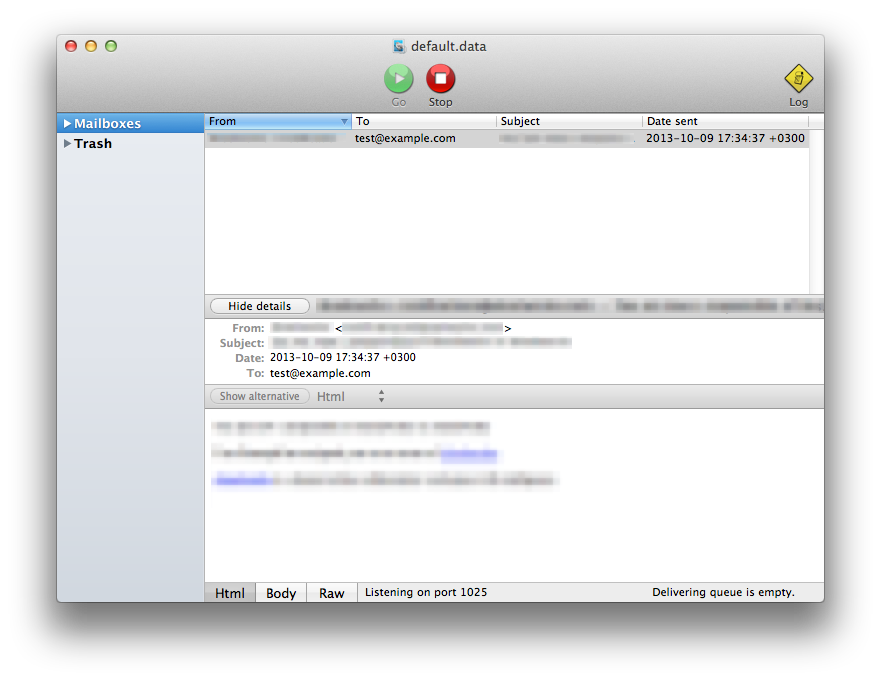
MockSMTP (€8,99) and MailCatcher (open-source) are great tools when you’re trying to debug emails, but not everyone on your team necessarily has one of them installed (or maybe you just don’t have one of them running constantly).
In case you don’t know what MockSMTP and MailCatcher do: they’re essentially SMTP servers for development. Instead of sending emails to their intended recipients, they collect them and give you a nice UI where you can inspect them at your leisure.
Using MailCatcher or MockSMTP conditionally in development is actually pretty easy and only requires you to add a few lines of code to your development.rb file:
require "net/smtp"

ThanksForAllTheFish::Application.configure do
  # … other settings redacted …

  # Try to sniff out if MockSMTP or MailCatcher is running
  begin
    smtp = Net::SMTP.start "localhost", 1025
    if smtp.started?
      smtp.quit
      puts ">> WARNING: Found an SMTP server on port 1025"
      puts "   Assuming that it is MockSMTP or MailCatcher..."
      puts ">> Emails WILL be sent to the SMTP server on port 1025"

      config.action_mailer.delivery_method = :smtp
      ActionMailer::Base.smtp_settings = {
        address: "localhost",
        port: 1025
      }
    end
  rescue Errno::ECONNREFUSED
  end

  # … other settings redacted …
end
What does this code do? First of all we require NET::SMTP so that we can use it to detect whether there is a server on port 1025 (luckily both MockSMTP and MailCatcher use port 1025 by default).
Secondly we try to start an SMTP connection to port 1025. If the connection starts, we know that there’s an SMTP server running there and thus we can configure Rails to use it to send emails. If the connection doesn’t start, we don’t need to do anything.
Port 1025 isn’t a standard port for SMTP, so there’s little danger that we’d end up sending real emails to people from our development machine. If someone has a live SMTP server running on a non-standard port on their development machine we can assume that they know what they’re doing and can deal with the consequences.
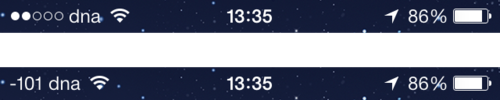
If you’d like to see your actual signal strength (in dBm) on your iPhone instead of the normal little signal strength baubles, this is possible (though it’s a bit of a hack).
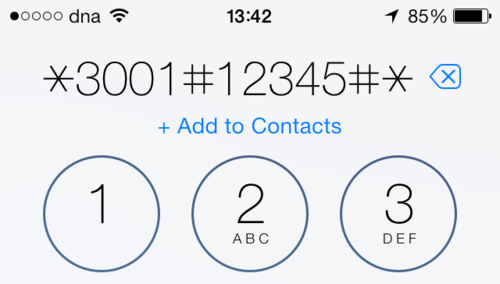
Open up the Phone app and dial in *3001#12345#*, then hit Call .
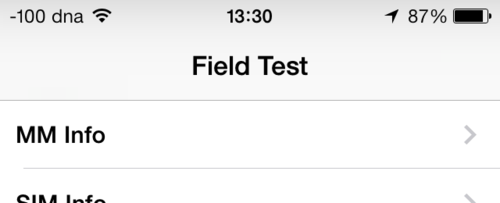
Field Test Mode will open up immediately and you’ll see the signal strength in dBm in the upper left corner of the screen. Tapping the number (or baubles) will toggle between dBm and little baubles.
If you hit the home button and return to the home screen, the baubles will return, so don’t do that.
To make the signal strength stick:
The signal strength should remain visible in the upper left corner of your screen, though I had to go through the whole procedure a few times before I got this to work (the first couple of times Field Test Mode just restarted instead of quitting).

I just pushed an update to my nordea gem bumping it to version 2.0.1 .
The main news here is that the gem is now compatible with money 5.1.1 and above.
If you’ve ever wondered why email parsing (or email address parsing) is so terrible, you should watch this video.
Ricardo Signes at YAPC::Asia Tokyo 2011
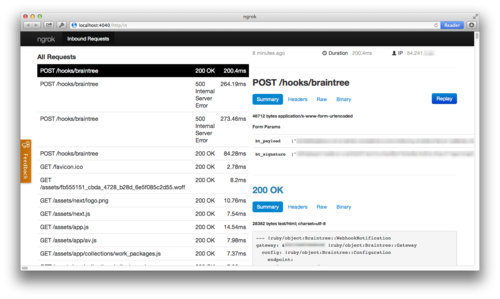
ngrok is a handy tool that let’s you tunnel your local ports on your development machine to the public Internet. In that way it’s similar to Progrium’s localtunnel, except it comes with a cherry on top: request introspection
When you start up a tunnel with ngrok (e.g. ngrok 3000), it also gives you access to a sweet web interface which let’s you inspect requests made to the tunnel.
ngrok has binaries available for Windows, Linux, and OS X (I created a pull request to Homebrew to add a formula for ngrok, so installing it should be easier on OS X soon).
After you’ve checked out ngrok, you should have a look at my hobby project: Piranhas